
Add and edit items to a board
Add notes, photos, videos, shapes, and more to your boards, then edit their properties to customize fonts, colors, and sizes.
Corkulous boards can hold many types of items, from simple sticky notes to videos, PDFs, and nested boards. This page covers the ways to add items, what each item type does, and how to edit items once they’re on the board.
Ways to Add Items
- Tap or click: Tap an item in the shelf to add it to the board.
- Touch and hold, then drag: Drag an item from the shelf to place it precisely.
- Copy and paste: Paste photos, text, PDFs, and links from other apps.
- Drag and drop: Drop files directly onto the board — multiple items at once are supported.
- Use the drawer: An optional tray you can enable in board settings.
Item Types
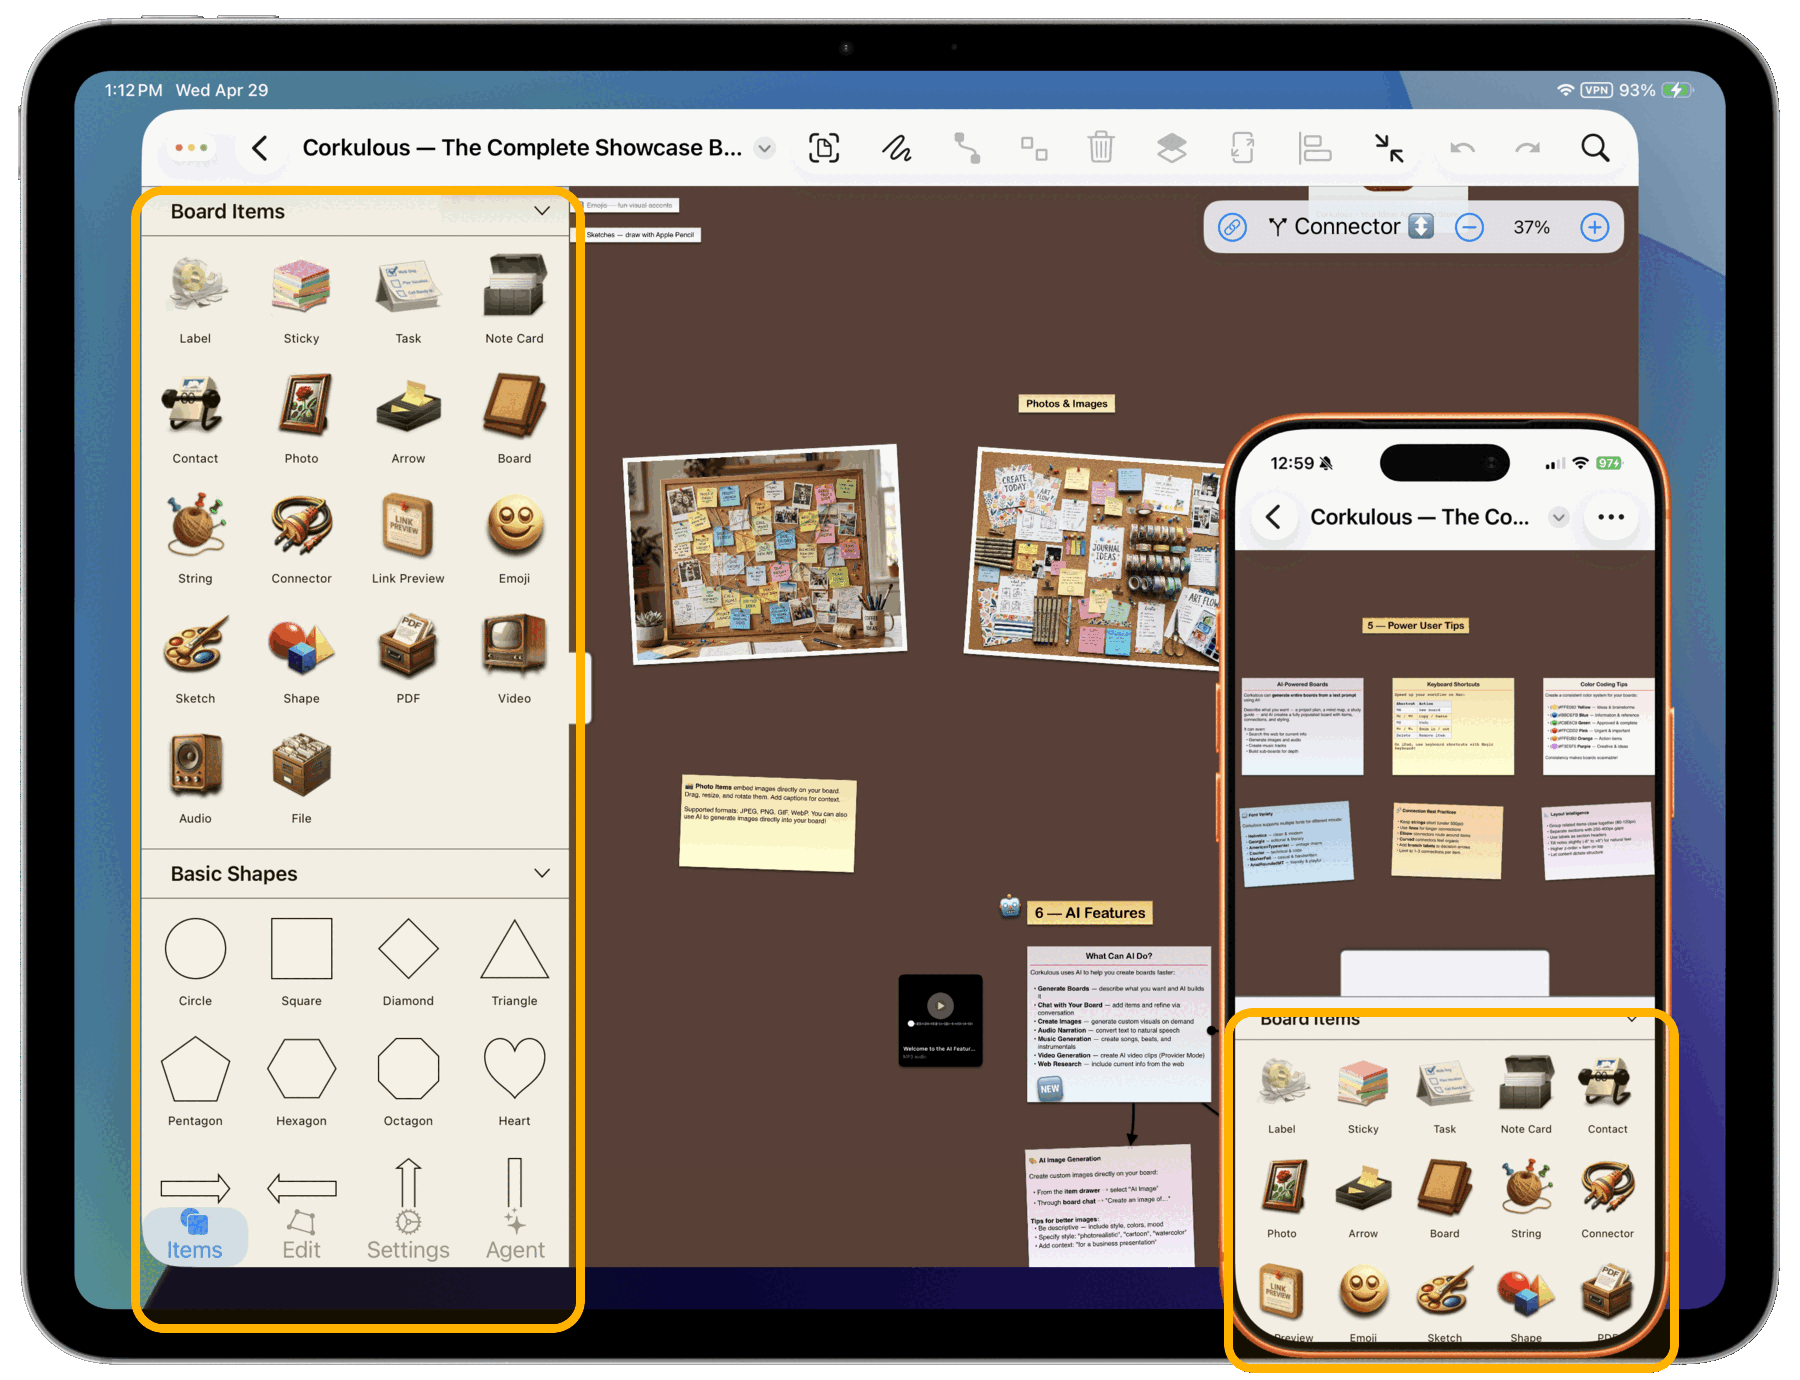
- Labels: Tag and group related items. Labels can stick to other items so they move together.
- Sticky: Quick text notes for reminders, ideas, or annotations. Customize color and size.
- Tasks: Create checklists, track progress, and mark items complete.
- Note Card: A title and body with separate formatting — great for study notes or longer writing.
- Contact: Add a person from your Contacts list. Useful for org charts or reference boards.
- Photos: Add images for visual brainstorming, mood boards, or presentations.
- Arrow: Arrow labels that point to items. Arrows can stick to other items.
- Board: Nest a board inside another to avoid endless canvases. This opens the board creation screen.
- Strings: Pinned string connections for casual relationships.
- Connectors: Lines and arrows for flowcharts and diagrams.
- Links: Web link previews. Links remain tappable in exported PDFs.
- Emojis: Visual emphasis, status markers, or personality for your board.
- Sketch: Draw directly on the board for quick ideas or annotations.
- Shapes: Common diagram shapes with text inside them.
- PDFs: Attach PDFs and scroll within the item on the board.
- Videos: Embed video clips that play on the board.
- Audio: Record or add audio and play it inline.
- Files: Attach other file types. Corkulous generates an icon preview; open the file with Quick Look.
Drawer

Tap the drawer to open or close it, then drag an item onto the board.
Editing Items
Select any item to see its properties panel, where you can customize fonts, colors, sizes, and more.

On iPad and Mac
- Tap an item once to reveal the properties panel in the sidebar.
- Change fonts, colors, sizes, and other settings.
- Select text to see Markdown formatting shortcuts.
On iPhone
- Double-tap an item to enter edit mode (the keyboard appears).
- Tap the paintbrush button to open the properties panel.
- Tap Done when you finish editing.
Tip: Use Copy Style and Paste Style to quickly apply formatting between items. To make a style the default for new items, use Save as Insert Style. See Working with Styles for details.
Overlay Controls (iPad/Mac)
On iPad and Mac, the overlay controls appear in the top-right corner of the board. They give you quick access to connections, zoom, and pan mode.
Controls
| Control | Function |
|---|---|
| Link button | Toggle connector mode on or off |
| Connector/String | Switch between connection types |
| − | Zoom out |
| Percentage | Current zoom level — tap to reset to 100% |
| + | Zoom in |
| Mouse button | Toggle pan mode — click and drag to scroll the board. On iPad it appears once a mouse or trackpad is in use |
Creating Connections with Handles
The fastest way to connect items:
- Enable connector mode: Tap the link button. It fills in when active.
- Choose a connection type: Tap “Connector” or “String” to toggle between them.
- Select an item: Tap the item you want to connect from. Four arrow handles appear around it (top, bottom, left, right).
- Drag to connect: Drag from any arrow handle toward another item. The connection attaches automatically.
This method is faster than adding connections from the shelf because you can create multiple connections without switching tools.
Zoom Controls
Use the zoom controls to navigate large boards:
- Zoom out (−): Decrease zoom to see more of the board.
- Zoom in (+): Increase zoom for detail work.
- Percentage: Shows the current zoom level. Tap it to reset to 100%.
You can also pinch to zoom or use the keyboard shortcuts Command-Plus, Command-Minus, and Command-0. On Mac, the mouse scroll wheel zooms the board as well.
Pan Mode (iPad and Mac)
With a mouse or trackpad, dragging on empty board draws a selection box. Pan mode changes that so a drag scrolls the board instead. There are two ways to enter it:
- Mouse button: Click the mouse icon in the overlay controls. Pan mode stays on until you click it again. On iPad the button appears once a mouse or trackpad is in use; on Mac it is always shown.
- Spacebar: Hold the spacebar to pan for as long as the key is down, then release it to go back to normal. This works with a hardware keyboard on iPad as well as on Mac.
While pan mode is on, the mouse button in the overlay fills in. On Mac the cursor becomes a hand. On iPad the pointer becomes a round grab cursor over the board and turns back into an arrow over the toolbar.
A few things to know:
- Two-finger scrolling on a trackpad keeps working while pan mode is on.
- Pan mode turns itself off when you start editing text in an item or open the sketch canvas, so a drag does what you expect there. Holding the spacebar still pans while you sketch.
- Pan mode you turned on with the button stays on when you switch to another app and come back.
Tooltips (iPad and Mac)
Hover over any of the overlay controls with a mouse or trackpad pointer to see a tooltip describing it. On Mac, the main toolbar buttons have tooltips too.
